How to preview & select columns
Use Awesome Table Connectors’ Preview & Select columns feature to edit your output sheet's layout by choosing the columns you need, editing their names, and configuring a sort order before you run a request.
This article demonstrates how to use the Preview & Select columns feature. As an example, we are using the Zendesk connector to export a list of all articles from our knowledge base to perform a content audit.
Click Preview & Select columns.

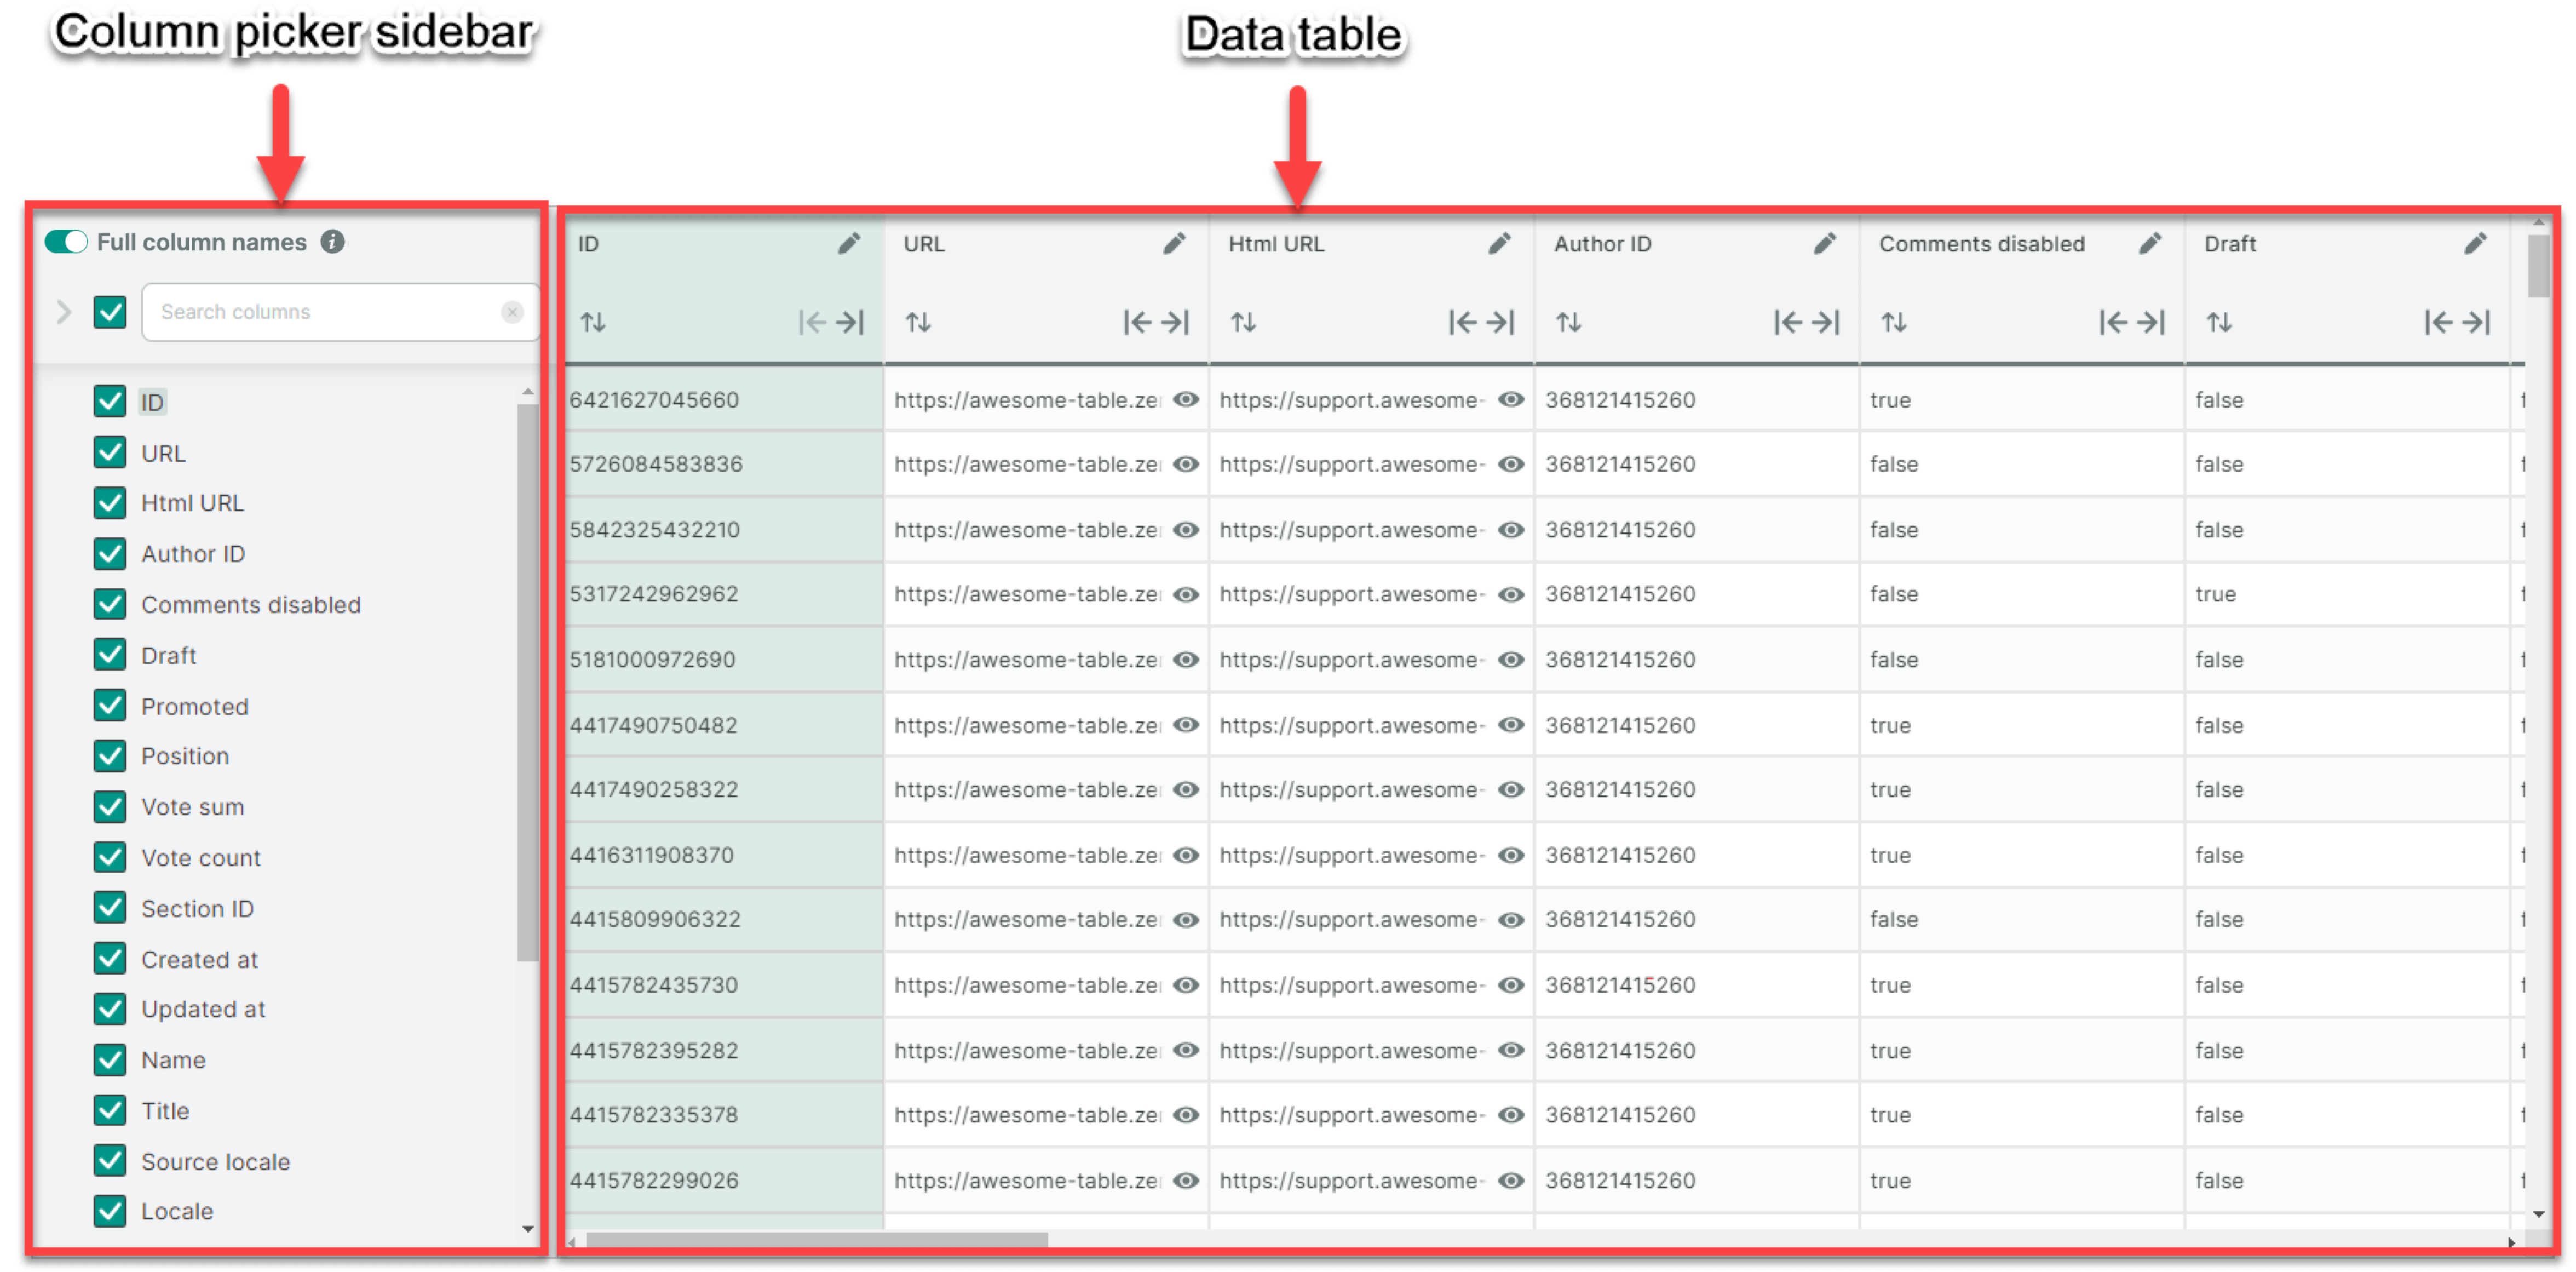
The Preview & Select columns window opens. This window has two main areas in its layout: the Column picker sidebar and the Data table.
In the column picker sidebar, deselect all columns using the main checkbox.
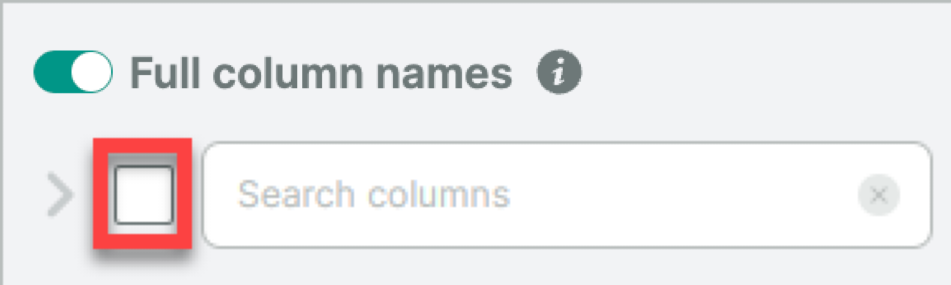
The data table is now empty.
Select the columns you want to get in your output. For each article we are selecting Title, Created at, Updated at and Html URL.

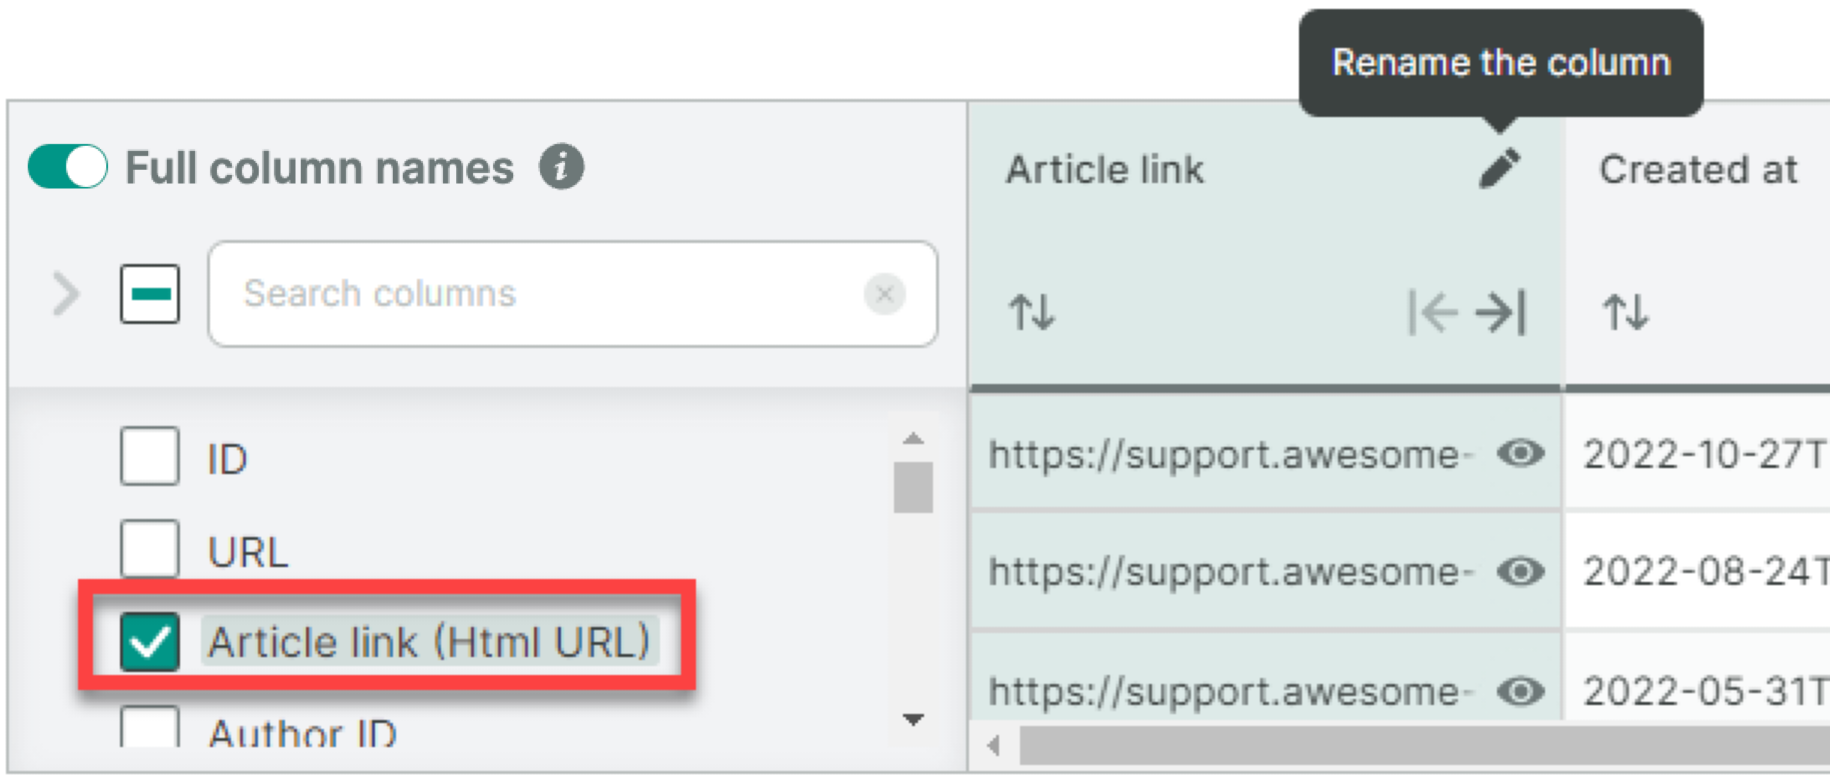
Rename the columns according to your preferences or naming conventions. We are renaming Html URL into Article link.
The new column name is displayed in the sidebar, along with the original name for reference.
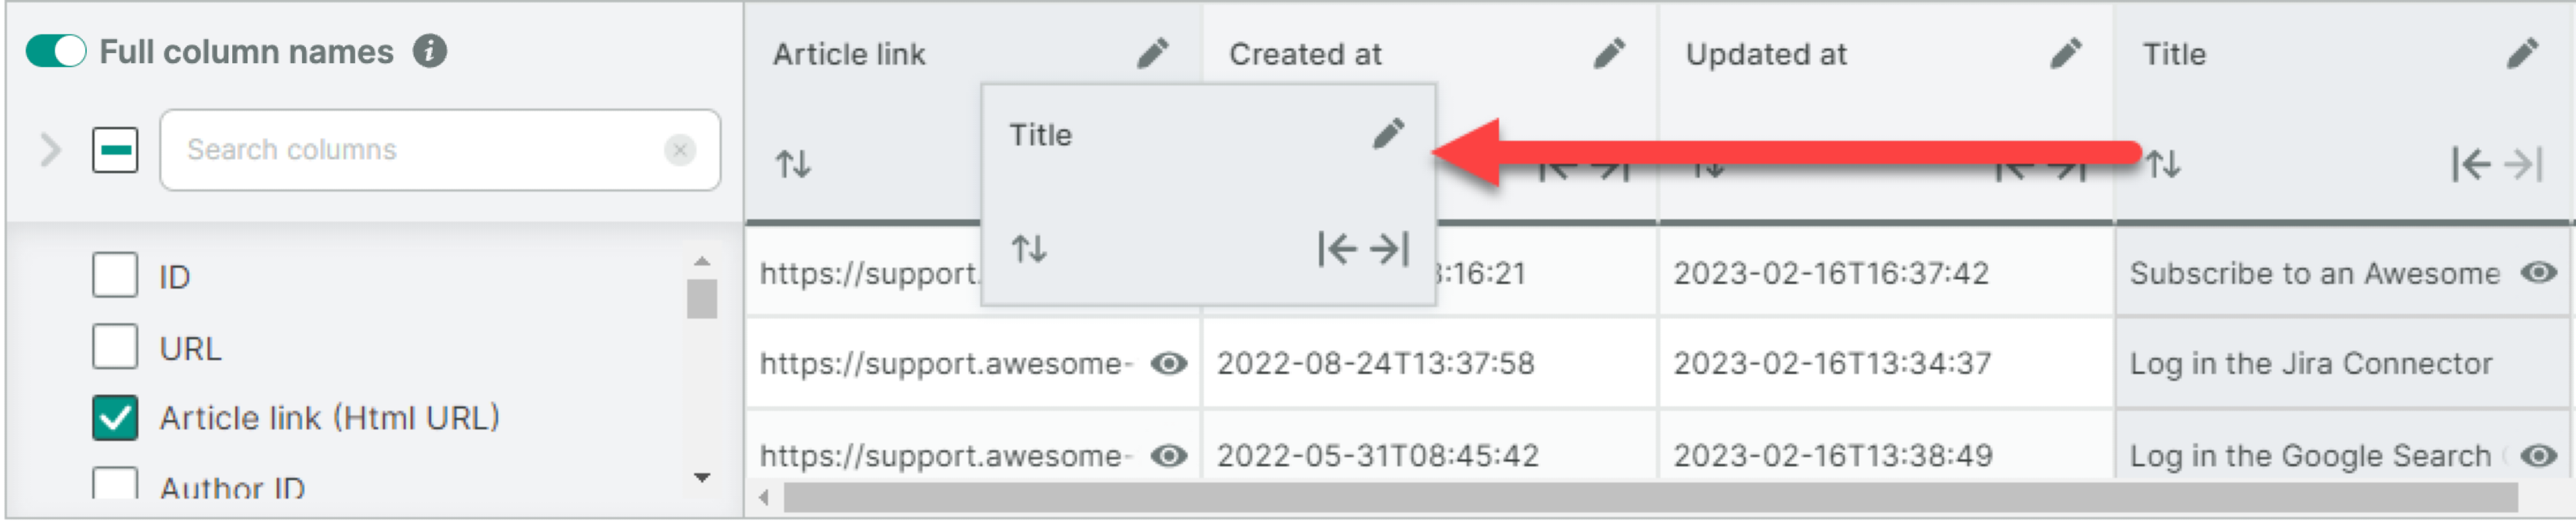
Drag and drop the column headers to reorder the columns. We are moving the Title column to the left.
Click Save changes to save your changes along with your request and exit the window.
Awesome Table Connectors informs you if your changes have been succesfully applied.
You have successfully previewed, selected columns and saved your output sheet's layout.
Run your request with the new layout and start your content audit.